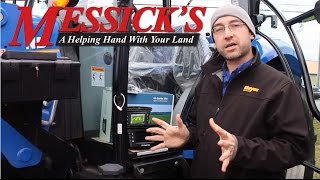
We're going to set up an EZ-guide 250 here, go through some of the steps. This system is set up on the easy mode, so depending what you have, your setup, you may or may not see the buttons laid out the same as what we see here. This is just a welcome message letting you know that you'll go through some initial setup. We'll hit the OK button in reference to that checkmark icon there so we'll hit OK.
This is asking us if we want to be in metric, or US for measurement. We're going to go with US today, and once we have the proper selection done, we're going to hit OK again. For antenna type, in our install video, we covered whether you get a patch antenna, or the AG 115 upgrade for the six to eight-inch accuracy. For this setup, we have the AG 15 antenna on the top of this tractor so we've selected that and we're going to hit OK, and it's asking if we want to see those steps that we just went through again.
If somebody is just doing this for the first time you can leave that up there. After you've gotten comfortable with and understand what they're talking about, you can come down here and select no and hit OK, that brings us to our main run screen. We've got icons on the right, and icons on the left. We're mainly going to be working on the right here for setup, on the left is operation, and information buttons.
First thing to do is in the top right at the corner of the screen you see this circular arrow that says we're going to get started so we hit OK, and the first information that's looking for is implement with. For this, let's say we have a 10-foot disc or something behind us. We're just going to hold the down arrow, and those numbers are going to go down we'll release around 17 we'll hold it down a little more, and then we'll just use a thumb press each increment to get this down to 10 feet.
The thing to point out on this is each time you change implements this is going to be a number you're going to want to change. If you have a notebook with different implements you're using with the system, jot them down, and that way you don't have to be measuring things, but you want to be precise about this number because this is going to dictate what your guidance path is going to be as you work back and forth across the field.
If you do this wrong, you'll have a skip and overlap, and things won't make sense and it's most likely that this information was not put in properly. I've got our 10 feet, we're going to hit the OK button referencing that we're going right. Overlap and skip, and we are not going to do any of that today, but if you wanted to- maybe if you were spraying, you could put a two-inch overlap in, but for today, like I said, we're going to do zero.
This is another important setup point, this is referencing on the screen the point from where your antenna is installed to where the implement is engaging the ground. If it's a disc and you have two gangs, you'd want to measure to the middle of the two gangs since they're both engaging the ground, if you were spraying you'd want to go to your spray boom, if you were spending fertilizer out you'd want to go to your fertilizer spinners where the materials coming out.
We're going to say that we are several inches back here. We'll go like, 75 inches. Again, you'll want to measure this, we aren't physically pulling an implement so it's not a big deal for us today, but again, measure it from the antenna to the point where the implement is engaging the ground. We'll hit OK. Left-right offset, again with a disk, or maybe as this picture is dictating a hay mowing disc bind, you'll have an offset from where the antenna is so you'll want to put that measurement in, so you'll want to know the centerline of the tractor, and the centerline of the machine and you give it a difference there.
If you were one or two inches to the left and you can see it's similar to these other set up windows, where you're just telling it how many inches you are one direction or another based off of the antenna location. We're going to leave that at zero. Once you have that offset in there your tractor will be off the line, but these lines will be referencing where the implement needs to be. You'll be guiding the tractor off the line and implement will be at the right spot. We'll hit OK, because we're on zero where we are going to be.
These are all the guidance patterns. If you have straight fields, you'll see here something called straight AB. That is, if you want to start at one end of the field put your A, go to the other side and push B. I'll go through some of this in another video. A + is a pattern if you know how many degrees of heading you have in relation to north, like on a compass. Identical curve will allow you to curve if you have contour fields, and have sweeping bends. That'll give you one curve, and that'll mimic that curve the whole way across the field so you can uniformly have that same curve.
Adaptive curve. You can do a curve, and then if you come to a tree, or a power pole, or a wet area, and you need to deviate around that area and change your guidance pattern it will pick up on that and it will reset your guidance pattern to be the deviation instead. Pivot. We're on the East Coast, not many folks are using pivots around here, but pivots are for- with irrigation pivots, and how you lay those fields out. Headland guidance pattern is for getting guidance for a headland setup.
If you want to do three or four setups of headland pass, and then do a/b lines in the middle that's where you're going to use your headland pass. The last one and kind of a popular one especially for our area again on the East Coast, a lot chopped up fields, is freeform. Freeform allows for as you can see in the picture, you might have a dogleg over here in a straight section over here, and you need to really be recording different lines to make it worth your while to use the guidance system.
This allows for multiple lines to be recorded across the same field. One other thing to point out on the left side, you'll see a question mark here. If you have any need to reference what all this is, and you're not quite sure, on a lot of these windows that we've been through there's a question mark. If I hit this number 2 button that lines up with that question mark it gives us all the verbage, kind of like what I went through for straight AB, A +, identical curve, and it's going to talk through a lot of that same stuff and help refresh your memory on which one you want to be using for a certain application.
We push the check mark OK to get out back to where we were. For this setup, I'm going to go to straight AB, and hit OK. Once we've done that we're back to our run screen where we've got our A button here, so we can start when we get to that point where we want to mark at A point, then we'd go to the other end and mark a B point, again we'll be doing this in another video. You'll see how that works. Magnifying glass, you can zoom in, come all the way out and zoom in, and then we have our settings button with the wrench icon. I've scrolled down to that and I'll hit OK.
You can see user mode is easy. We've got GPS setup, satellite positioning, brightness, backlight, about the EZ-guide. We can see that Quick Start menu again. I'm going to back out of that. This is the easy mode. On advanced mode you'll see other windows where you can reference the angle that you're looking at the machine. It'll let you pan and zoom around the field to see where you have it covered, so those are some of the differences. On the left side, you'll see a coverage logging button. This tractor icon references this number two button, and if we push it you see the green paint comes on, and in the next video you'll see how that's applicable and we'll show you how it's painting the field.
We push that, turn it off. Above that, the information, the eye is reference to this number one button, shows you how much area you've covered if you have your implement with setup, and your nudge if your lines need to be adjusted at all, and then storage for data is there as well. If we hit that button again, shows us satellites. Shows us we're currently connected to eight satellites. The correction age and then what correction satellite we're looking at and the signal-to-noise ratio. Hit it again.
Features, if you're in advanced mode you can put things in there like rocks, and flags for gopher holes, or references that you want to come back to, and then it'll show you how far you are to get to that feature. That takes us back, another feature, one last thing to mention would be that in Advanced Mode, you can do boundaries with this set up, here in EZ we don't have that option, but you'd have buttons over here for setting up boundaries, and knowing the total area of the field before you even start.
That's a quick rundown on how to get started in the field with your EZ-guide 250. Stay tuned for our next video where we'll show you how to actually use the buttons while we're operating the tractor.