Kubota >
75545-63600
element not set
This part fits your tractor
This part fits 20 models
More Loader ...
Installation Tips
(3 hours)
I did one at a time, took pictures, and didn't rush. I used a pipe wrench to loosen the end and all 4 were quite easy, spanner would have been preferred but I didn't have one. The one I inside side seal was flexible and I used my finger to install it, the special tool wasn't necessary. The stiff seal that is a tough one, I heated to 200 degrees in hydraulic fluid, clamped the piece to the bench, and used an ice pick. It stretched but went back in shape by just working it with my fingers. It slid onto the cylinder pretty well because of the beveled edge. I got these ideas from the other videos and they worked out very well. The first one took about an hour but after figuring it out the others took about 20 minutes or so without rushing. I wouldn't hesitate to do it again. My tractor is the Kubota L3000DT.
I did one at a time, took pictures, and didn't rush. I used a pipe wrench to loosen the end and all 4 were quite easy, spanner would have been preferred but I didn't have one. The one I inside side seal was flexible and I used my finger to install it, the special tool wasn't necessary. The stiff seal that is a tough one, I heated to 200 degrees in hydraulic fluid, clamped the piece to the bench, and used an ice pick. It stretched but went back in shape by just working it with my fingers. It slid onto the cylinder pretty well because of the beveled edge. I got these ideas from the other videos and they worked out very well. The first one took about an hour but after figuring it out the others took about 20 minutes or so without rushing. I wouldn't hesitate to do it again. My tractor is the Kubota L3000DT.
3/7/2024
PORT CLINTON, OH
William
PORT CLINTON, OH
William
(2 hours)
There's on tricky seal to install. You'll know it when you get to it. I tried the boiling water trick I found online, but it didn't work. What did work was careful brute force. This leaves the seal stretched. Wrap it in electrical tape and clamp it with a hose clamp. Put it in the freezer for a couple of hours. Works like a charm. 4 hours for both cylinders, of which half that was figuring out how to conquer this seal.
There's on tricky seal to install. You'll know it when you get to it. I tried the boiling water trick I found online, but it didn't work. What did work was careful brute force. This leaves the seal stretched. Wrap it in electrical tape and clamp it with a hose clamp. Put it in the freezer for a couple of hours. Works like a charm. 4 hours for both cylinders, of which half that was figuring out how to conquer this seal.
6/28/2023
HARRISON, AR
NA
HARRISON, AR
NA
Unrated
(1 minute)
No problem
No problem
5/23/2023
CATHARPIN, VA
JOHN
CATHARPIN, VA
JOHN
(2 hours)
Always start by cleaning the hydraulic cylinder before removing from tractor, with special attention to the hydraulic hose connectors. Avoid getting any contaminates in the hose ends. Loosen the piston retainer collar while the unit is still mounted on the tractor. This is easier than performing the same operation on the workbench. Removing the piston and end cap is easily done with a bench vice and proper wrench. Do not secure the cylinder body in a vice, as it may be damaged from over tightening. Put the mounting end of the cylinder in the vice, and support the other end with a block of wood resting on the workbench. Replace all O rings and seals regardless of appearance. The rebuild kit will have more parts than you will need for your unit, but that is because the kit is designed for more than one type of hydraulic cylinder. All rubber O rings are easily removed and replaced, but the difficult parts are the seal that goes inside the end cap on the piston, and the plastic like ring the goes between the two split rings over the outside of the same part. Work the plastic like ring over the body of the piston by stretching it as you work it on. Once in place, it will seem to be ruined and all out of shape, but in a few minutes, and with a little massaging, it will regain its original shape. The inner seal is a little more difficult, but can be installed with a little patience and a trick. Not the direction of the flange and think about how it functions to hold the hydraulic fluid within the cylinder. Bend the seal in the shape of a U with one end in the seat and the opening of the U at the other end of the seal. It will pop into place with the first or second attempt. Inspect it to make sure it did not roll. Think about how it operates. Assemble in reverse order, and do not forget the outer seal. It is crucial in keeping impurities out of the cylinder. Once again, think about its wiping action when installing. Good luck
Always start by cleaning the hydraulic cylinder before removing from tractor, with special attention to the hydraulic hose connectors. Avoid getting any contaminates in the hose ends. Loosen the piston retainer collar while the unit is still mounted on the tractor. This is easier than performing the same operation on the workbench. Removing the piston and end cap is easily done with a bench vice and proper wrench. Do not secure the cylinder body in a vice, as it may be damaged from over tightening. Put the mounting end of the cylinder in the vice, and support the other end with a block of wood resting on the workbench. Replace all O rings and seals regardless of appearance. The rebuild kit will have more parts than you will need for your unit, but that is because the kit is designed for more than one type of hydraulic cylinder. All rubber O rings are easily removed and replaced, but the difficult parts are the seal that goes inside the end cap on the piston, and the plastic like ring the goes between the two split rings over the outside of the same part. Work the plastic like ring over the body of the piston by stretching it as you work it on. Once in place, it will seem to be ruined and all out of shape, but in a few minutes, and with a little massaging, it will regain its original shape. The inner seal is a little more difficult, but can be installed with a little patience and a trick. Not the direction of the flange and think about how it functions to hold the hydraulic fluid within the cylinder. Bend the seal in the shape of a U with one end in the seat and the opening of the U at the other end of the seal. It will pop into place with the first or second attempt. Inspect it to make sure it did not roll. Think about how it operates. Assemble in reverse order, and do not forget the outer seal. It is crucial in keeping impurities out of the cylinder. Once again, think about its wiping action when installing. Good luck
10/15/2022
Oviedo, FL
Michael
Oviedo, FL
Michael
(2 hours)
Busted one of the seals when putting it on so i used the exttra black one to do the center of the three seal piece and it worked, second arm i have done in two years , the dealer wanted 900 to do the job and the part was 59.00 plus shipping
Busted one of the seals when putting it on so i used the exttra black one to do the center of the three seal piece and it worked, second arm i have done in two years , the dealer wanted 900 to do the job and the part was 59.00 plus shipping
8/23/2022
BARNEGAT, NJ
GEORGE
BARNEGAT, NJ
GEORGE
(1 hour)
Take pictures before removing old seals, and keep everything clean.
Take pictures before removing old seals, and keep everything clean.
6/22/2022
WEST FORK, AR
Adam
WEST FORK, AR
Adam
The hardest part of this job is getting the caps loose it's best to leave the cylinder on the tractor and loosen the caps with a spanner wrench although one of mine was so tight we had to use a 36 inch pipe wrench to loosen it and a set of o ring picks are very helpful, it's best to get the plastic seal that goes inside the cap warm because it make it pliable and easier to install it's a very easy job if you are good with tools
6/18/2022
HUDDLESTON, VA
JAMES
HUDDLESTON, VA
JAMES
(1 hour)
3/10/2022
DANVILLE, IL
ELAINE
DANVILLE, IL
ELAINE
(1 hour)
Very easy (is that one star or five?) with the right tools but these cost $125. Watch Kevin Robinson's "Kubota hydraulic cylinder rebuild" on YouTube. Take pictures of seals in place, and, once removed, orientated correctly
Very easy (is that one star or five?) with the right tools but these cost $125. Watch Kevin Robinson's "Kubota hydraulic cylinder rebuild" on YouTube. Take pictures of seals in place, and, once removed, orientated correctly
2/23/2022
CHRISTIANSBRG, VA
rob
CHRISTIANSBRG, VA
rob
Show all 10

Kubota Black & White Keytag
Part# KT23A-A960
37
in Stock
$1.95


Kubota Black w/ Back Mesh Cap
Part# KT23A-H907
100+
in Stock
$14.95


Kubota Two Tone Malibu Sunglasses
Part# KT22A-A820
64
in Stock
$5.95


Kubota Koozie
Part# 2003491360001
55
in Stock
$1.95


Kubota Decal
Part# K2771-65122
25
in Stock
$3.99

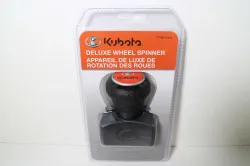
Kubota Deluxe Wheel Spinner
Part# 77700-01540
100+
in Stock
$13.23


Kubota Stripe Camo Bill Cap
Part# 2004428940001
4
in Stock
$16.95


1:64 Ross Chastain 2024 Kubota Kansas Race Win ARC Diecast
Part# WX12465KUBRZW
33
in Stock
$12.99


Kubota Sunset Heritage Cap
Part# KT24A-H1092
19
in Stock
$17.95

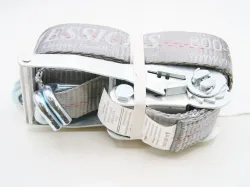
2" x 20' Messick's Cargo Ratchet Strap
Part# MFECS2X20
90
in Stock
$12.99


Kubota 50th Anniversary Limited Edition Book
Part# CUKT22C-A852
31
in Stock
$49.95

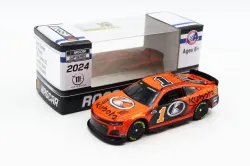
1:64 Ross Chastain 2024 Kubota ARC Diecast
Part# CX12465KUBRZ
66
in Stock
$10.99


Kubota Men's Distressed Cap
Part# KT20A-H558
13
in Stock
$17.95

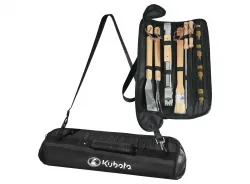
Kubota BBQ Grilling Tools Set
Part# KT21A-A569
4
in Stock
$29.95


Kubota Parking Only Embossed Aluminum Sign
Part# KB09-3344
44
in Stock
$18.95


Kubota Sandwich Cap
Part# 2004686550001
100+
in Stock
$15.95


Kubota Pro Chino/Mesh Cap
Part# 2002234850001
99
in Stock
$11.95


Kubota Navy Denim w/ Tan Mesh Cap
Part# KT19A-H392
100+
in Stock
$17.95


Kubota Tractor Parking Only Sign
Part# 2004434860001
1
in Stock
$21.95

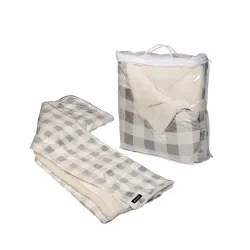
Kubota Micro Mink Sherpa Blanket
Part# KT21E-A633
3
in Stock
$39.95


1:24 Ross Chastain 2024 Kubota ARC Diecast
Part# CX12423KUBRZ
6
in Stock
$64.95


Kubota Charcoal Tire Tread Cap
Part# KT23A-H908
100+
in Stock
$17.95

Kubota Tire Tread Keytag
Part# KT23A-A958
100+
in Stock
$3.95

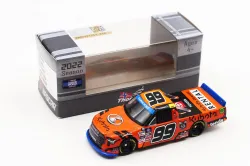
1:64 Ben Rhodes 2022 Kubota ARC NASCAR Truck Diecast
Part# T992265KUBBR
52
in Stock
$7.99


Kubota Black & White Keytag
Part# KT23A-A960
37
in Stock
$1.95


Kubota Black w/ Back Mesh Cap
Part# KT23A-H907
100+
in Stock
$14.95


Kubota Two Tone Malibu Sunglasses
Part# KT22A-A820
64
in Stock
$5.95


Kubota Koozie
Part# 2003491360001
55
in Stock
$1.95


Kubota Decal
Part# K2771-65122
25
in Stock
$3.99


Kubota Deluxe Wheel Spinner
Part# 77700-01540
100+
in Stock
$13.23


Kubota Stripe Camo Bill Cap
Part# 2004428940001
4
in Stock
$16.95


1:64 Ross Chastain 2024 Kubota Kansas Race Win ARC Diecast
Part# WX12465KUBRZW
33
in Stock
$12.99


Kubota Sunset Heritage Cap
Part# KT24A-H1092
19
in Stock
$17.95


2" x 20' Messick's Cargo Ratchet Strap
Part# MFECS2X20
90
in Stock
$12.99


Kubota 50th Anniversary Limited Edition Book
Part# CUKT22C-A852
31
in Stock
$49.95


1:64 Ross Chastain 2024 Kubota ARC Diecast
Part# CX12465KUBRZ
66
in Stock
$10.99


Kubota Men's Distressed Cap
Part# KT20A-H558
13
in Stock
$17.95


Kubota BBQ Grilling Tools Set
Part# KT21A-A569
4
in Stock
$29.95


Kubota Parking Only Embossed Aluminum Sign
Part# KB09-3344
44
in Stock
$18.95


Kubota Sandwich Cap
Part# 2004686550001
100+
in Stock
$15.95


Kubota Pro Chino/Mesh Cap
Part# 2002234850001
99
in Stock
$11.95


Kubota Navy Denim w/ Tan Mesh Cap
Part# KT19A-H392
100+
in Stock
$17.95


Kubota Tractor Parking Only Sign
Part# 2004434860001
1
in Stock
$21.95


Kubota Micro Mink Sherpa Blanket
Part# KT21E-A633
3
in Stock
$39.95


1:24 Ross Chastain 2024 Kubota ARC Diecast
Part# CX12423KUBRZ
6
in Stock
$64.95


Kubota Charcoal Tire Tread Cap
Part# KT23A-H908
100+
in Stock
$17.95


Kubota Tire Tread Keytag
Part# KT23A-A958
100+
in Stock
$3.95


1:64 Ben Rhodes 2022 Kubota ARC NASCAR Truck Diecast
Part# T992265KUBBR
52
in Stock
$7.99


The seal with the metal band needs to be pried out and the new one gets wedged back into place. One band will be really hard to get stretched to get into place. I boiled a pan of water then remover pan from burner for 3-5 minutes and then placed the washer in a plastic bag and submerged the washer in the hot water for several minutes to make it soft enough to get it in place
CANTRALL, IL
DON