

Excavator Operation for beginners. ISO\SAE controls, parts of a machine.
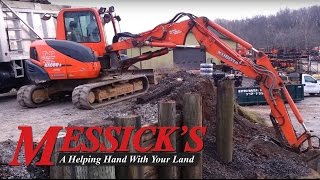
Tags : excavator | kubota | kubota-construction | kx-series-excavators |Neil from Messick's here, out today on a Kubota KX033 Mini Excavator. I'm going to walk through here with you today on some excavator operations basics. If you're going to be running a machine or getting known to one of these for the very first time, I'll run through how the different controls here work and talk you through some of the new tips that you might want to know as a new operator.
Before we start going through the excavator controls, you should know that there's really two different control patterns that you'll find on machines. They're known as ISO controls or SAE controls. In the United States, SAE controls are the more popular control pattern. On a machine like this that has pattern selection, they're generally going to be pattern A.
Now, if you've run a machine like this before, as you learn how these controls work and you stop thinking about what you're doing, it's almost like riding a bike. You'll stop thinking about what the controls do and just start operating the machine, and you'll talk to anybody who's figured this out that's run these things before. Changing patterns is like learning a different language. It's really, really challenging.
If you've never run a machine before and you're going to start on this for the first time, generally, it's going to be a better choice to be in that SAE pattern or pattern A, like I've set this up for currently. If you look right down here, you'll always find a sticker denoting where that pattern selection is. Sometimes, it's underneath of a safety cover, but in the case right here, it's right on this machine over top of the sticker here from California that tells us that we're going to get cancer from operating this machine.
Thankfully, we're in Pennsylvania, we should be okay, but you'll find that pattern selection here and you can make that switch so that you're operating the machine in the most comfortable and familiar way for you. I'm going to start the machine up here and run you through what the control layout looks like for ISO controls. I'm going to start the machine.
When you go to start one of these for the first time and notice it didn't start, that's because the safety lever has to be in the up position that disables the controls. Push that down. Now I'm going to run through my control. In my left-hand side over here, if I take my stick and go left to right, it's going to rotate the upper part of the machine. The upper part of an excavator is called the house.
If I go front and back, I'm going to take the dipper in and out. Then over on my right-hand side, if I take this side left to right, I'm going to rotate my bucket. If I go in and out here, I'm going to raise my boom up and down. You have two functions on each one of those sticks. If I want to drive the machine forward and back, every excavator is going to have two sticks in front of you. Those are always oriented with the front of the machine being over top of the blade.
Do remember you can spin these things in circles. If you're facing this direction, this is front, not the direction that my boom is facing. Where my blade is, is always the front of the machine. If you're facing over the front and you press the two drive sticks front, you're going to go forward or backwards.
Now, these two sticks here are going to operate much like a zero-turn mower or a skid loader does, where if I rotate them in opposite directions, I drive my left and right side independently. When you're driving, particularly on turf, you generally don't want to do spins in place because those tracks are going to do a lot of turf damage.
It's always best to try to turn left to right by driving forward and then keeping the outside track moving a little bit faster. You'll do less turf damage that way. You don't ever really want to be turning with these tracks still. You always want to keep them moving. Smaller excavators like this will have a pivot right down here in the boom, where the boom can turn independently left to right from the house.
Large excavators generally don't have that. The boom will be situated somewhere back here by your side, but in the case of this, I have a foot pedal down here on the floor that could swing my boom from left to right. This is generally used if you're going to get up, say, against the side of a house and you need to be in confined spaces.
Rotating this allows you to be closer to things. You'll notice that this excavator is equipped with a thumb. The operation of those boom hydraulics on these machines is done with a rocker switch up here on your operation stick. On some older machines, sometimes you'll see those operated with foot pedals down here kind of where my boom swing is.
Sometimes, you'll have one on your left foot. In this case, it's done up here on the controls. You'll notice here if I operate this right now, it doesn't work. You need to turn on your auxiliary hydraulics in order for them to function. If we press the aux button down here, it will turn on my thumb, and now I can rock this thing back and forth in order to grab stuff.
In the advanced course here, we'd tell you that you can dive in and do some configurations on these hydraulic circuits oftentimes that change the amount of flow that they have or to be able to toggle them on and off for different kinds of attachments that you will put out there. Tampers and hammers and that kind of thing are going to have different setups for their hydraulics in the monitor pod down here than what this thumb would be.
Generally, I'm operating at idle right now, but as you turn up your RPMs up here, you're going to have more hydraulic flow. Now, the faster the engine is going, the faster the hydraulics are going to move. When you're learning one of these for the very first time, it's often not a bad idea to have this thing running a little bit slower.
It just helps things move a little bit more fluidly. As you do raise that up and your engine goes faster, you're also building hydraulic pressure. Generally, you need that pressure in order to have digging force. Idling one of these things, you're not going to get its full capacity out of it. You can see I have a front blade here.
I use that blade to go up and down with my left-hand stick over here. I also have a green button on top of it. That's because this machine has two-speed track motors. When you're driving an excavator, they generally are not fun to transport with. They're generally very slow, but you can speed them up by pressing the two-speed button.
If I'm driving along here and I pop that green button, I can go into a little higher gear and shift those motors up a little bit faster. Some of the more recent models will have automatic shifting track motors that will load sensors shift on their own. This machine doesn't have that equipped, but there are other models that do.
Generally, you're going to need to have that turned off when you're making tight turns. These aren't machines that are exactly in high speed, especially known for their tractive power. You can push a little bit with the blade and get some work done, but you're certainly not going to move mountains.
If you're on asphalt and trying to turn, you need to be in low range in order to be able to rotate the machine. If you're coming off of a trailer for the first time and you can't rotate the machine, it's often probably because you're in too high of a gear with your track motors.
That's a little bit on the operation of an excavator. If you're getting one of these for the very first time, you just need to be patient with yourself and give yourself some time. Really, ideally, what you need to do is know what the controls do and simply start to work through them and use them to the point that you stop thinking about what you're doing and you start tackling the job at hand.
Be patient with yourself when you jump into one of these for the very first time. We do some follow-up videos here as well, as showing some of the technique that you might want to learn when doing this for the very first time. Follow along on subsequent videos here. We'll see that we can teach you about running an excavator.
If you're in the market for a piece of equipment like this, or you have parts or service needs for one that you already have, give us a call at Messick's. We're available at 800-222-3373 or online at messicks.com.
More Articles
Kubota KX080-3 Super Double Boom

Excavator Coupler Options
Today we have a customer setting up his excavator using a pin grabber coupler. I'm going to show you the pin grabber, exactly how it works and also the traditional mechanical coupler as well. And show you some of the two pros and cons of the different coupler systems that you can have between your buckets and your excavators. So the coupler that you'll typically find on most excavators is a traditional mechanical coupler.
Kubota KXO33-4 Compact Excavator Walk Around & Review
This model here replaces the prior model which we're lucky enough to have side by side, the KX91. Join me here as we walk around and we’ll point out a couple of new differences on this updated model. The KX91 has been a really popular model for us. We stock quite a few of them both for customers and for our own rental fleet. One of the things that’s made this machine so popular is that this is the heaviest Kubota excavator that we can sell that can fit onto a 10,000 pound trailer.